


If you’re an Amazon seller thinking of broadening your online reach, WooCommerce is a brilliant move! No hefty investment or extensive knowledge needed to set up an online storefront. With WooCommerce, businesses can create and manage robust online stores through the familiar WordPress environment.
Yet, migrating product details between both platforms can be time-consuming for e-commerce entrepreneurs. That’s why we’re presenting our guide on how to import Amazon products to WooCommerce store and back using M2E Cloud. We hope you find it helpful!

Why use M2E Cloud for WooCommerce import
Let’s first delve into why you should consider using M2E Cloud to import Amazon listings to WooCommerce:
Streamlined procedure. Importing a vast Amazon inventory into WooCommerce or vice versa can be daunting. M2E Cloud allows you to bulk-import products in a couple of clicks, moving your entire stock or particular items only.
Reliable data migration. M2E Cloud offers accurate and consistent import of product details into your WooCommerce store. The apps pulls titles, images, prices, and variations straight from your Amazon listings, ensuring they’re correctly sorted and display the right data.
Continuous inventory & order sync. M2E Cloud ensures real-time synchronization, so any product updates in your WooCommerce store are immediately reflected in Amazon Seller Central.
Comprehensive listing management. M2E Cloud’s features are at your disposal for managing both your Amazon and WooCommerce catalogs, including handling stock and orders, assigning flexible rules for quantity and pricing, tracking your sales success, and more.
Compatibility with various platforms. Beyond WooCommerce Amazon integration, M2E Cloud allows conducting sales on other platforms or marketplaces and engaging a broader audience worldwide.
Import WooCommerce products to Amazon
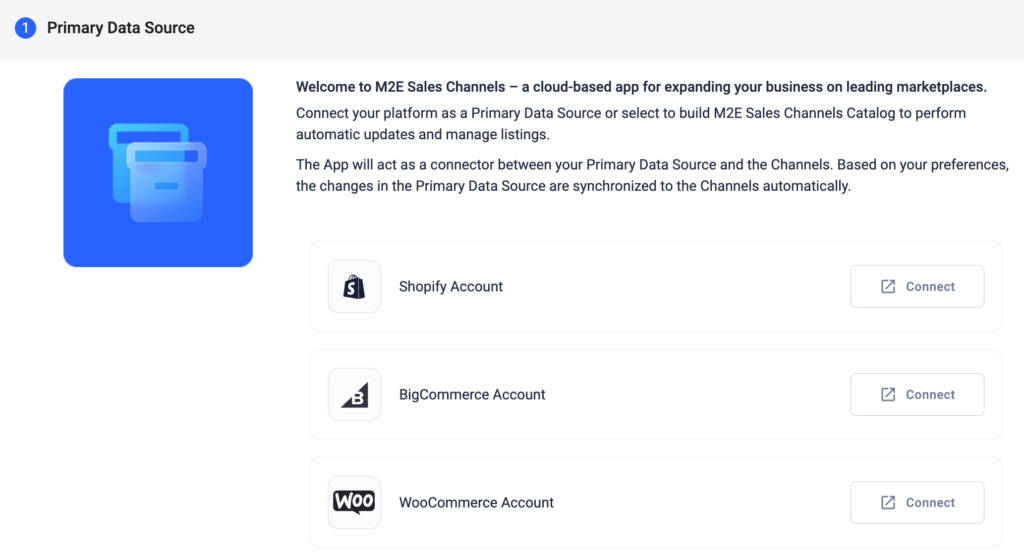
Step 1. Go through the onboarding wizard.
Register an M2E Cloud Sales Channels account, then link your WooCommerce and Amazon seller profiles.

Confirm Data Source and Order settings and set the default policies that the app will use to manage your inventory and synchronize item data with Amazon. While you are doing that, the app will be importing items from your connected WooCommerce and Amazon accounts.
Once you set the preliminary configurations, you have the option to enable synchronization for existing Amazon listings and list (import) new items to Amazon. The app will guide you through this process. Or you can skip it to proceed to M2E Sales Channels right away and finish the import later.
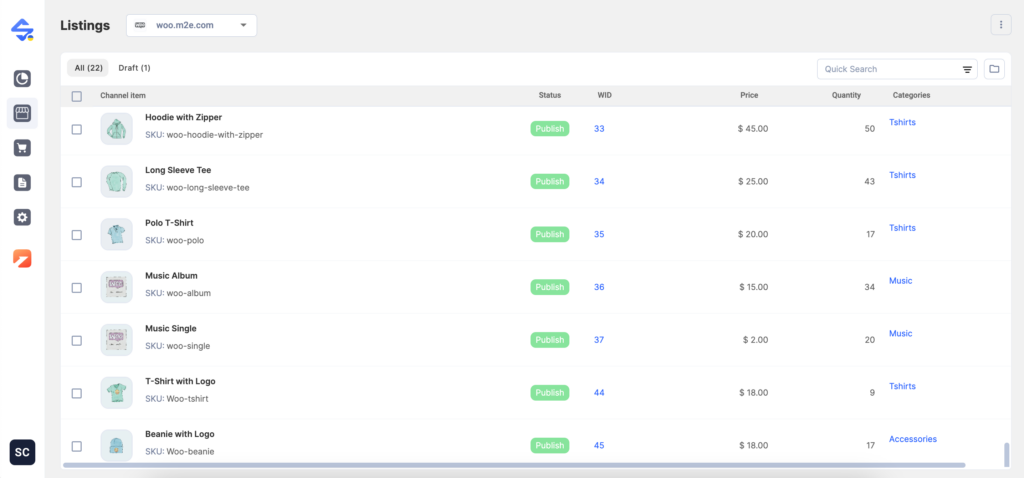
Step 2. Access your WooCommerce items.
Navigate to the Sales Channels tab and choose your WooCommerce account from the drop-down menu on top of the grid. There, you’ll see all the items imported from your WooCommerce store.
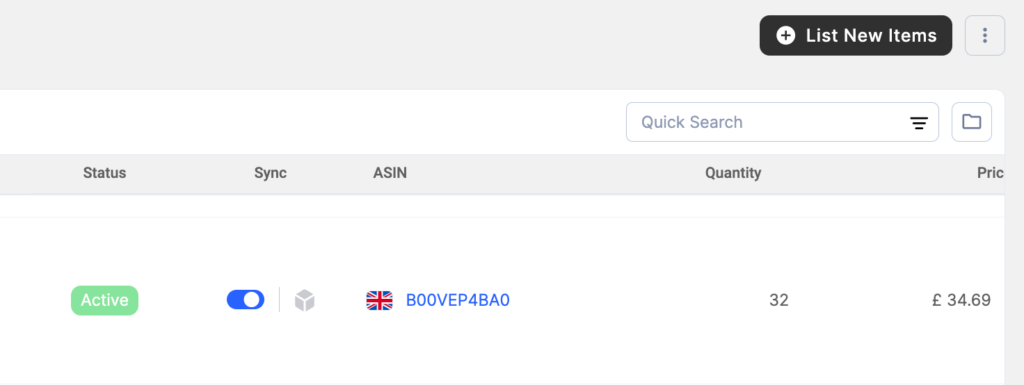
Step 3. Launch the import process.
Navigate to the Sales Channels tab and choose your Amazon account from the drop-down menu on top of the grid. Then click List New Items in the top right corner. You’ll see a new Amazon listing window.
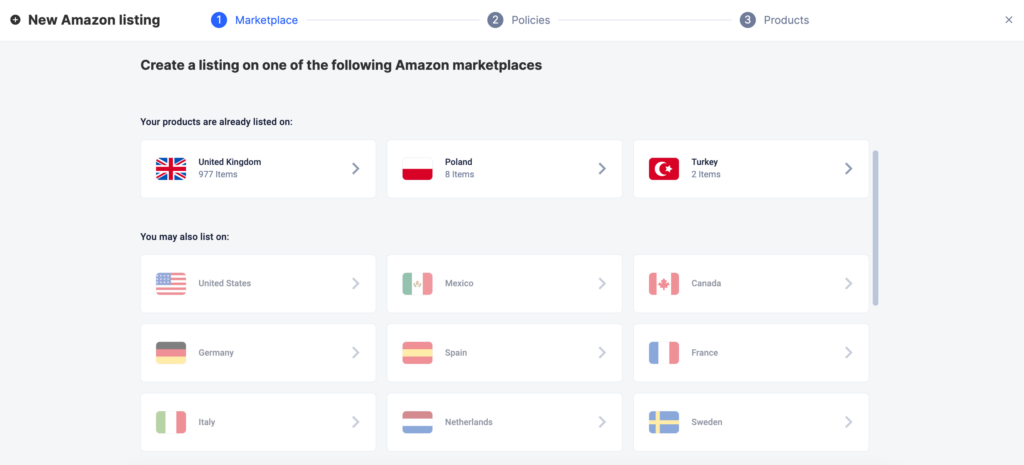
Step 4. Select the marketplace.
Select an Amazon marketplace where you wish to import the WooCommerce items. If some marketplaces aren’t available, enable them in Seller Central first.
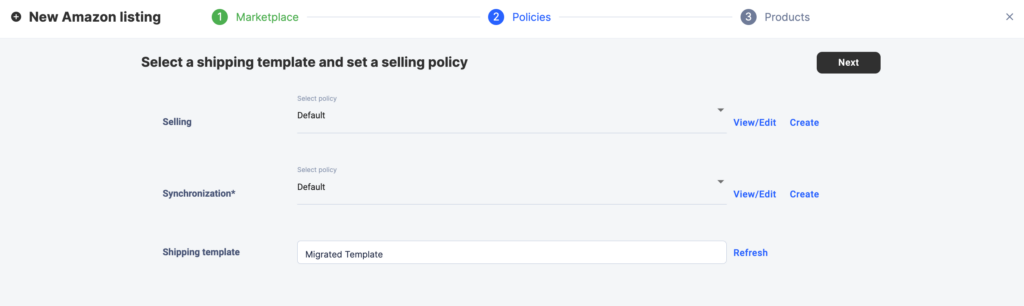
Step 5. Define product settings.
Create or select policies: Selling, Sync, and Shipping template to add extra configurations to your WooCommerce items. Once done, click Next.
Step 6. Select items to import from WooCommerce.
Choose WooCommerce items you want to import to Amazon. Mind that only Simple products can be imported.
Use Quick Search to find specific items via title, SKU, identifier, or any other parameter. To pick all items at once, tick the box next to the Title column. Once done, hit the List button at the bottom of the grid.
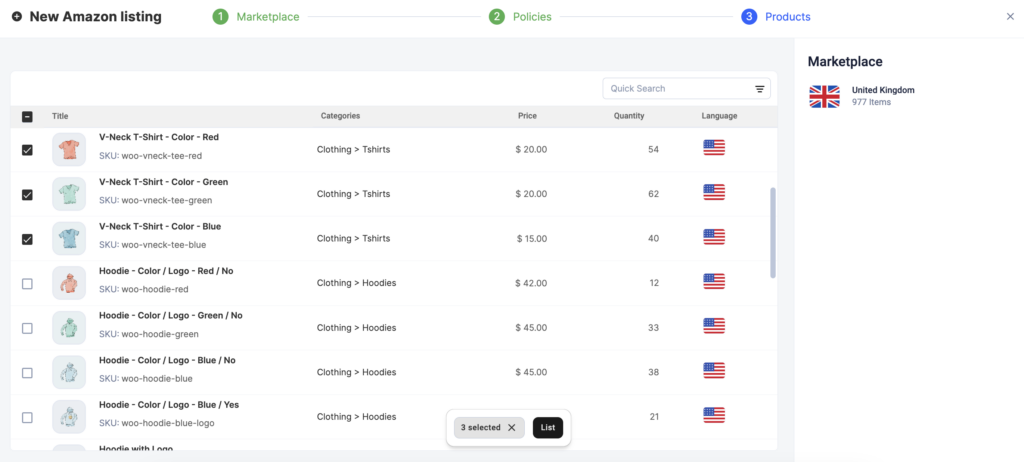
Your WooCommerce items will be imported to Amazon shortly.
Step 7. Enable item synchronization.
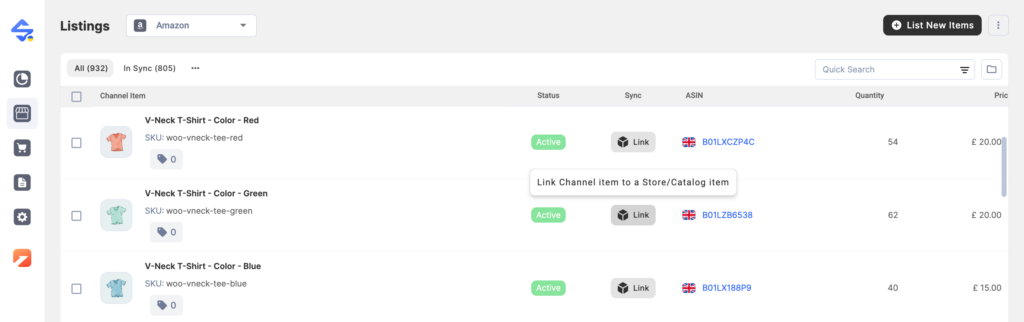
When your items become available on Amazon, it’s time to link and synch them with WooCommerce inventory. This is necessary to maintain data consistency and eliminate manual updates on your part.
If the SKU/barcodes of Amazon and WooCommerce items are identical, M2E Sales Channels will auto-link them based on this info. In case you’ve already managed to change the identifiers’ information on Amazon’s or WooCommerce’s side after the import, you’ll have to perform manual linking.
For that, click the Link button next to the Amazon item under the Sales Channels tab. You can find more detailed instructions in this guide.
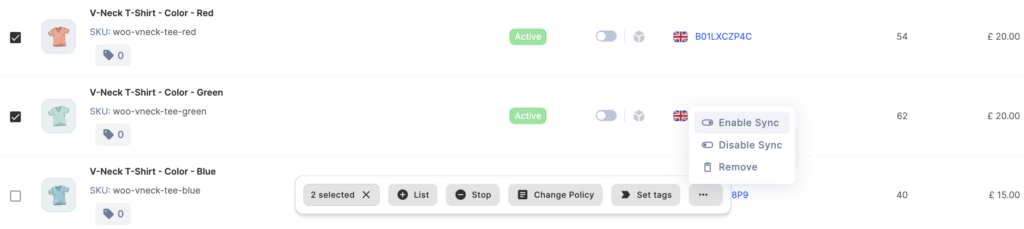
Once the items are linked, click the toggle next to the item to enable synchronization. You’ll see a relevant message if the synchronization is enabled.

To enable sync for several Amazon items simultaneously, select them by ticking the boxes on the left side of the grid. Then, submit the “Enable Sync” action from the menu at the bottom of the page.
Step 8. Enable order import (optional).
M2E Sales Channels provides a centralized system for managing your Amazon orders efficiently. The application imports orders from each connected Amazon account. This way, you can handle and ship them all from one place.
If you want the app to create an order in your WooCommerce once the customer places an order on Amazon, navigate to the Settings > Orders tab and enable the corresponding option. From there, you can also enable order creation only for items managed by the app and Amazon FBA items.

Apart from creating orders, M2E Sales Channels automatically syncs order statuses and tracking numbers between WooCommerce and Amazon.
Import Amazon products to WooCommerce
Step 1. Go through the onboarding wizard.
Register an M2E Cloud Sales Channels account, then link your WooCommerce and Amazon seller profiles.
If you’ve done that already, immediately proceed to step 2. Learn in more details about completing the onboarding process here.
Step 2. Export your Amazon items.
Navigate to the Sales Channels tab and choose your Amazon account from the drop-down menu on top of the grid. Then click Export in the top right corner.
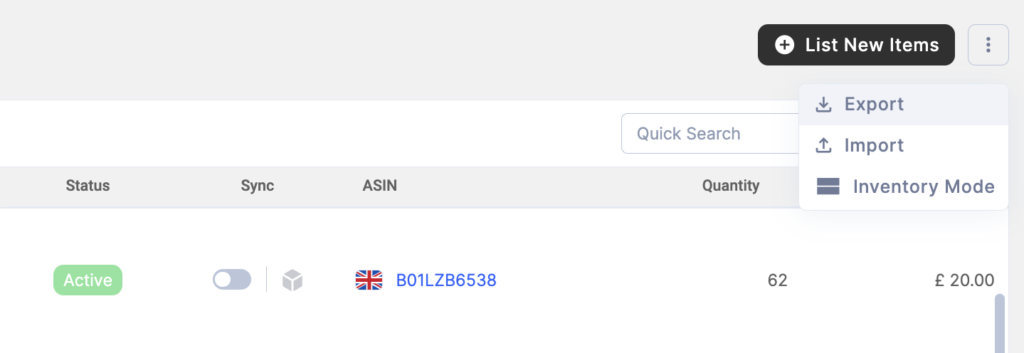
Your Amazon items will be exported to a CSV file. If you have several Amazon accounts connected, you’ll need to export items from each account separately.
Step 3. Import Amazon products to WooCommerce.
Navigate to your WooCommerce admin and click on Products > Import. You’ll see a pop-up window where you need to upload your exported CSV file.
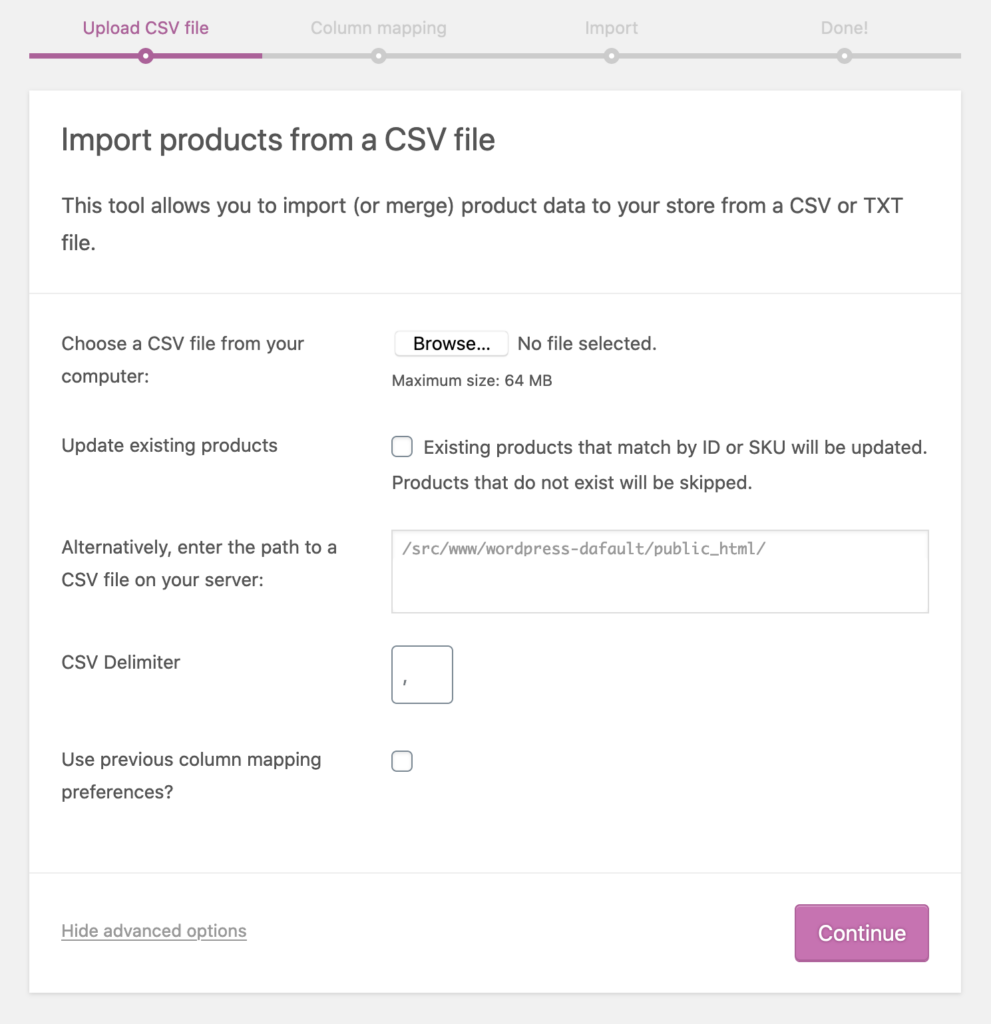
Set your import preferences, map CSV fields to products if necessary, and wait until the import is complete.
While M2E Sales Channels currently doesn’t support the direct import of products from Amazon to WooCommerce, we’re willing to introduce this functionality if there’s strong demand from our users.
Step 4. Check imported items in M2E Sales Channels.
If your WooCommerce store is connected to M2E Sales Channels, the app will import these items for their further management.
Navigate to the Sales Channels tab and choose your WooCommerce account from the drop-down menu on top of the grid. There, you’ll see all the items imported from your WooCommerce store.
Step 5. Enable item synchronization.
Now it’s time to link and synch your Amazon and WooCommerce inventories. This is necessary to maintain data consistency and eliminate manual updates on your part.
If the SKU/barcodes of Amazon and WooCommerce items are identical, M2E Sales Channels will auto-link them based on this info. In case you’ve already managed to change the identifiers’ information on Amazon’s or WooCommerce’s side after the import, you’ll have to perform manual linking.
For that, click the Link button next to the Amazon item under the Sales Channels tab. You can find more detailed instructions in this guide.
Once the items are linked, click the toggle next to the item to enable synchronization. You’ll see a relevant message if the synchronization is enabled.
To enable sync for several Amazon items simultaneously, select them by ticking the boxes on the left side of the grid. Then, submit the “Enable Sync” action from the menu at the bottom of the page.
Step 6. Enable order import (optional).
M2E Sales Channels provides a centralized system for managing your Amazon orders efficiently. The application imports orders from each connected Amazon account. This way, you can handle and ship them all from one place.
If you want the app to create an order in your WooCommerce once the customer places an order on Amazon, navigate to the Settings > Orders tab and enable the corresponding option. From there, you can also enable order creation only for items managed by the app and Amazon FBA items.
Apart from creating orders, M2E Sales Channels automatically syncs order statuses and tracking numbers between WooCommerce and Amazon.
Summing up
We’ve described every step for importing products from Amazon to WooCommerce and vice versa. If you have any questions or issues, don’t hesitate to contact the M2E Cloud support team or check out our knowledge base/user docs for extra help.
Best wishes in your sales endeavors!

